Difference between revisions of "Report Attributes via Reporting Templates"
(→Attribute Placement Step 4) |
|||
| Line 23: | Line 23: | ||
[[File:RT-ATTS-STEP4.PNG|Step 4|1200px]] | [[File:RT-ATTS-STEP4.PNG|Step 4|1200px]] | ||
| + | |||
| + | =Reporting Template Excel Workbook= | ||
| + | The Reporting Template is save and generated in the usual way. When the workbook is opened, you will seen 3 separate worksheets as well as the colour coding legend that was added in step 4. | ||
| + | |||
| + | |||
| + | [[File:RT-ATTS-1.PNG|Generated workbook|1200px]] | ||
| + | |||
| + | |||
| + | Note the default colour appears in the Obs Value cells. A completed worksheet might look like this. | ||
| + | |||
| + | [[File:RT-ATTS-2.PNG|Completed worksheet|1200px]] | ||
Revision as of 04:00, 28 April 2021
Contents
Overview
In the current version of the Registry, only Dimensions can be included in a Reporting Template (main worksheet) however it is possible to use Step 4 of the Reporting Template to identify attributes in such a way that when the Template is converted into an XML file, the attributes are included.
In this example I am using Data Structure which has an Attribute relating to the confidentially status of the reported data. This article assumes that you have a basic understandin of how to create a Template using the GUI as explained in this article - How to create a Reporting Template.
You can read more about Reporting Template Data Formats here.
Creating the Reporting Template
The template wizard is created in the usual way for steps for the first 3 steps as shown in the example below.
Step 2 allow the insertion of an instruction worksheet which will appear (in a separate worksheet in the generated Excel workbook when the Reporting Template is generated). You can use this to provide instructions for completion.
Attribute Placement Step 4
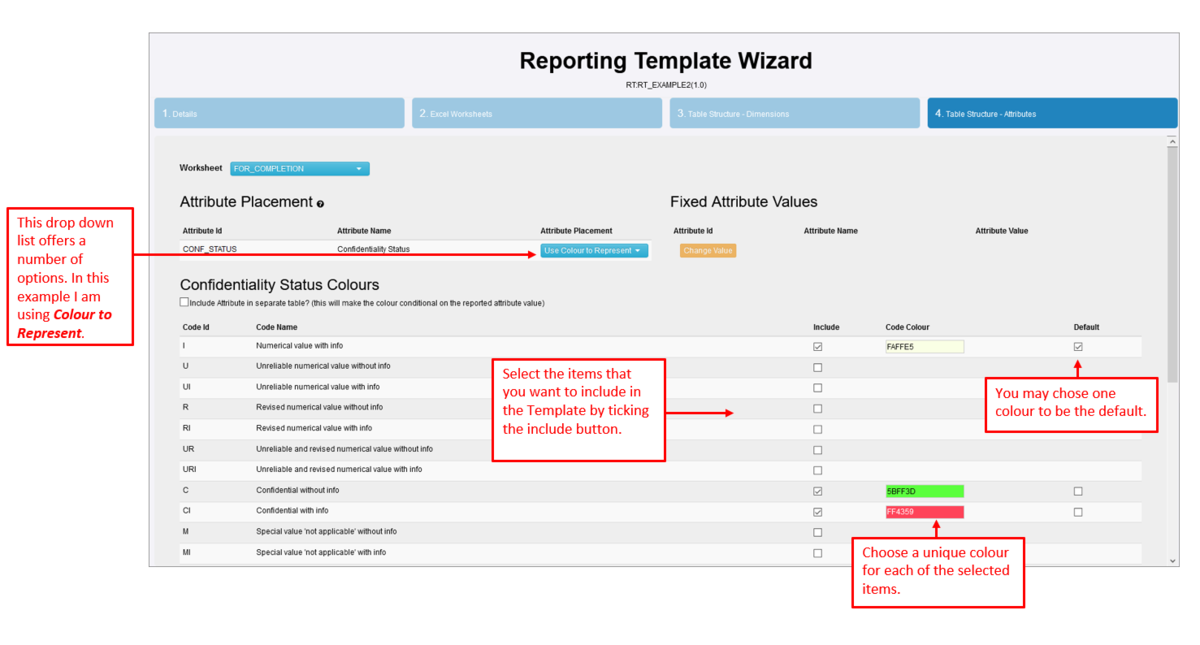
In this example, I have selected Use Colour to represent and selected 3 items to include as shown in the example below.
Reporting Template Excel Workbook
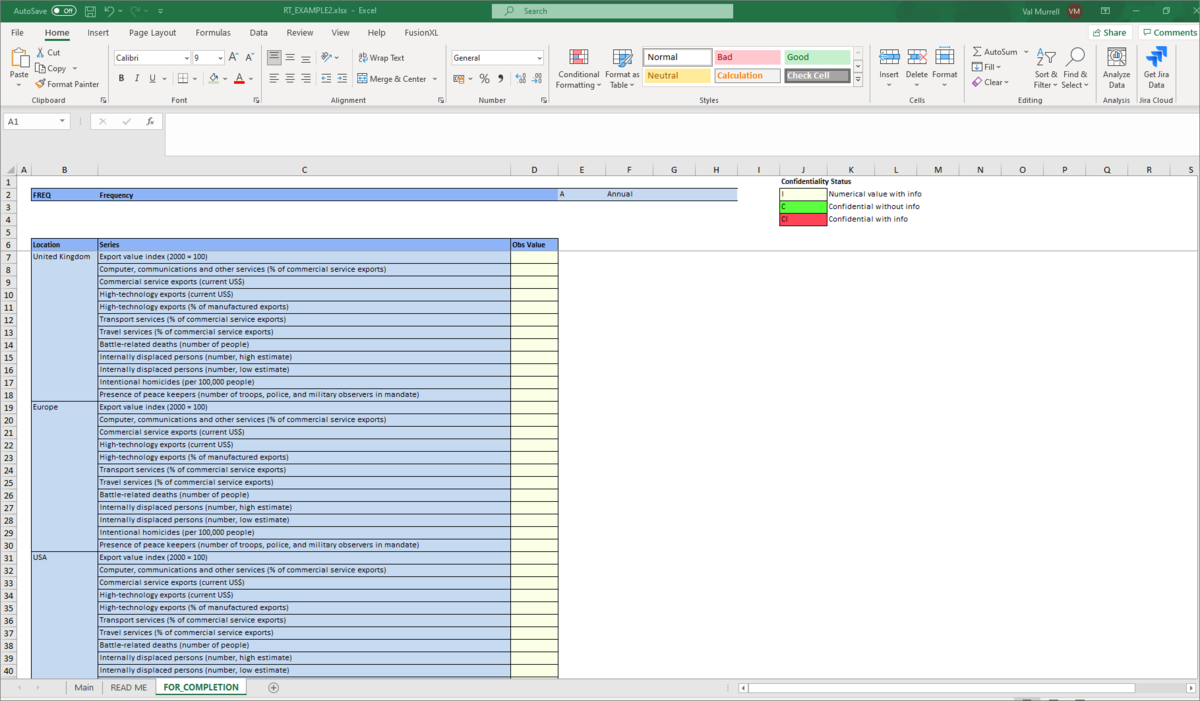
The Reporting Template is save and generated in the usual way. When the workbook is opened, you will seen 3 separate worksheets as well as the colour coding legend that was added in step 4.
Note the default colour appears in the Obs Value cells. A completed worksheet might look like this.


