FusionXL Author Helper
Contents
Overview
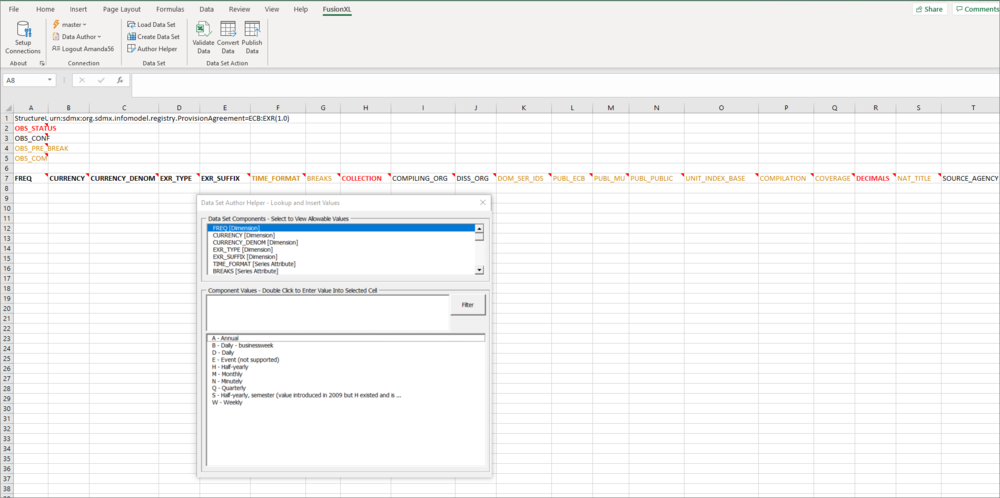
The Author Helper is an extremely useful tool which allows you to see the Components and allowable Codes expected based on the Dataflow and Data Provider combination. If codelists have been restricted based on the Dataflow or Data Provider, then the Author Helper will not include disallowed codes.
When selecting a Component in the Author Helper, the selected cell in the Excel worksheet will be automatically selected in the current row. Double clicking on a value in the Component Values section will automatically populate the current cell with the Code Id.
An example is shown below.
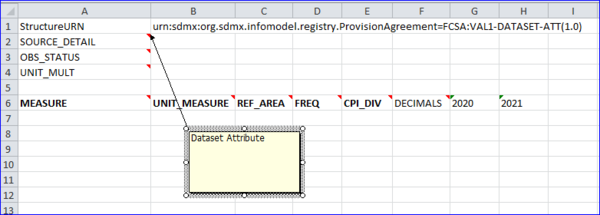
Dataset Attributes
Dataset attributes set a single value for the entire dataset.
Series Attributes
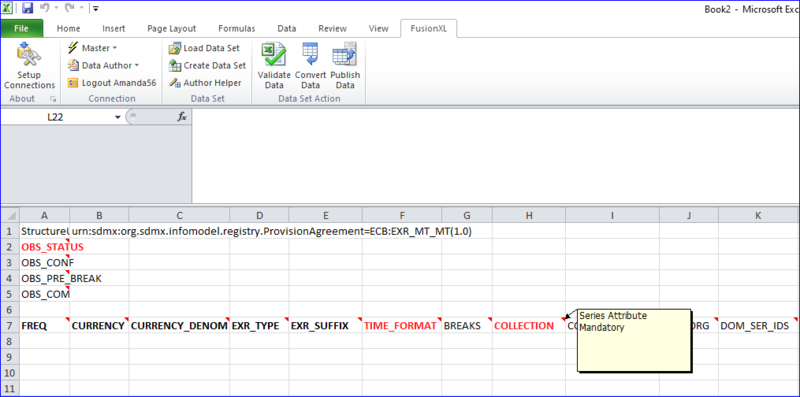
Series Attributes will appear in a column along with the dimensions as shown in the example below.
Mandatory Attributes
Will appear in bold Red text if the attribute is coded, or bold Brown text if it is uncoded. In the example above, In this case, the OBS_STAUS, TIME_FORMAT and COLLECTION attributes are mandatory and coded.
Observation Attributes
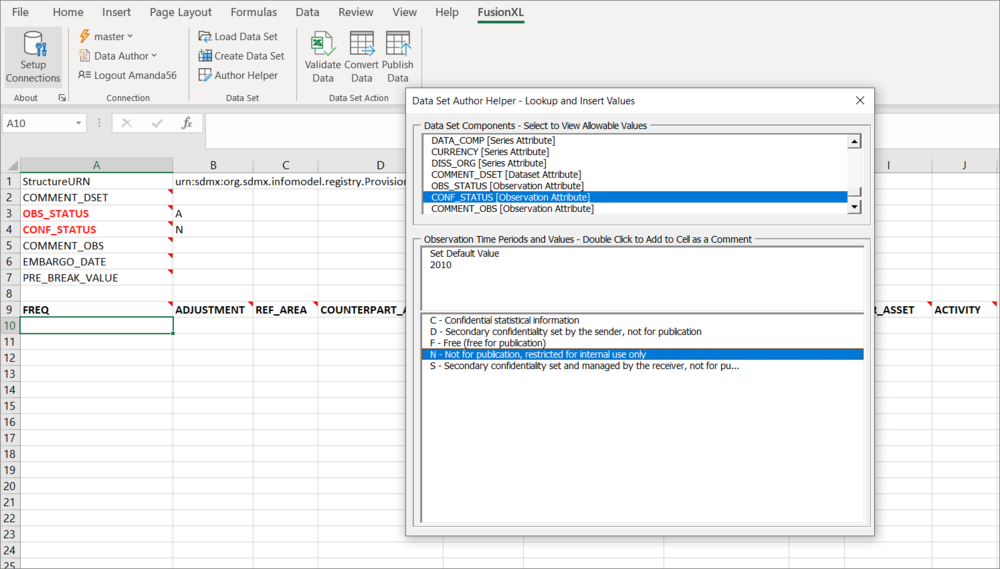
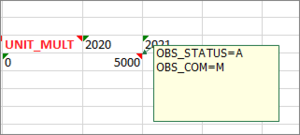
For observation attributes, the dataset author helper will also include the options to choose an observation time, or set the default value. If setting a value on the observation, then it will be inserted as a Cell comment (or note depending on the version of Excel), this is shown in the image below.
Observations with multiple attributes As shown in the example below, it is possible to include more than one attribute against each observation.
Default Observation attribute
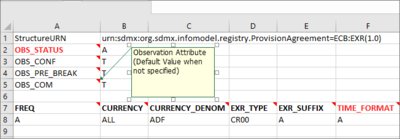
If a data set has many observations which have the same observational attribute code, a default can be entered in the rows below the header as shown in the example below.
Using the Filter
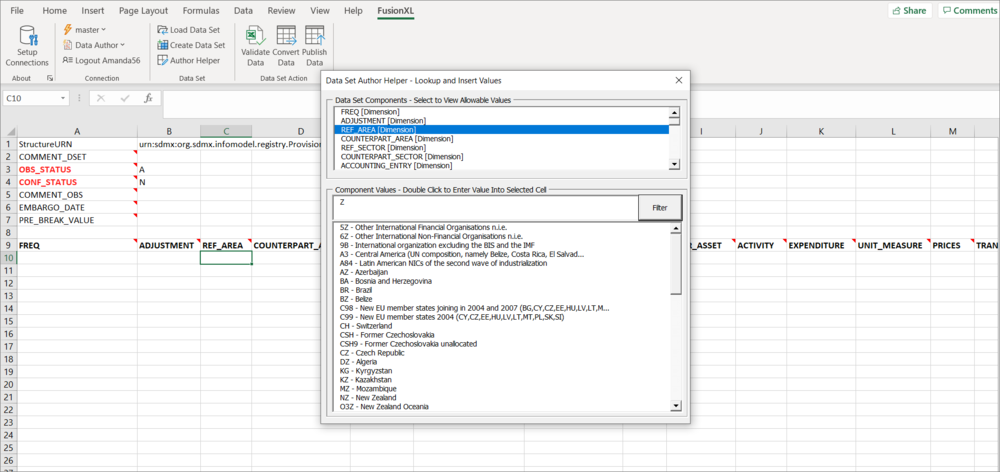
If the codelist used in a dimension etc has many possible codes, you can use the filter to help you find a code as shown in the example below.
First, select the Component (in this case REF_AREA) that you want to search on, next enter refine your search. In this example Z has been entered to search for all codes which contain 'z' in either the ID or description. Matches are displayed when the Filter button is clicked.
Long Code Lists
Please note that if the codelsit had more than 300 codes, only the first 300 will be shown. However you can use the filter to find codes that are beyond the 300 mark.
Uncoded Components
Attributes which are not linked to a codelist appear on the worksheet in brown text unless they are Dimensions. Dimensions are in black text, bold if coded and normal type if they are not coded.
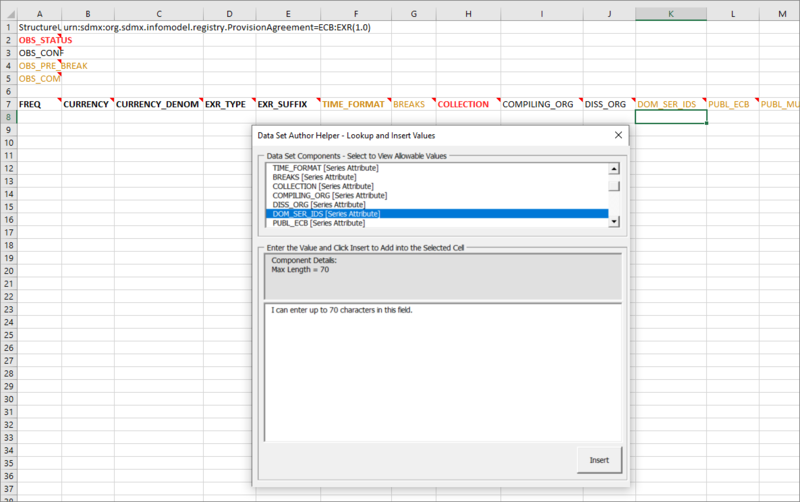
An example of an uncoded Attribute is shown below.
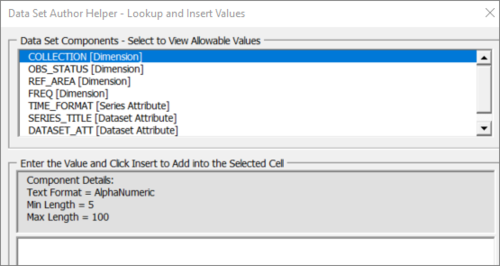
Instead of displaying a list of codes, the Author Helper will present you with a insert box to enter data, one you press Insert, the text entered will be placed into the worksheet in the selected cell.
Data Format
As well as the components which appear on a worksheet, the Data Structure allows formats to be set is Step 3 of the wizard via the Allowable Content feature.
In this example you will see that the Allowable Content for the COLLECTION component has been set to Alpha Numeric. If you hover over the Details link. more information will be displayed. If the Change button is selected, you will see the restriction options available.
The format and restriction details can be seen in the Author Helper too.
